
If you are lucky enough to live near the really cool, trendy stores like Trader Joe’s or Aldi, you may have seen some packages of cauliflower sandwich thins readily available in the store aisles at those places. Unfortunately, I don’t live anywhere near those popular stores, but my interest has certainly been piqued by all the rave reviews regarding those pre-packaged cauliflower sandwich thins on social media.
The reviews for these products come mostly from people I follow in weight-loss communties I participate in with my social media accounts. These folks post with great enthusiam about using cauliflower rounds to replace hamburger buns, sandwich bread, and even tortillas! I’ve been wanting to try these as a bread substitution for myself for quite some time; however I’ve searched unsuccessfully for months to find these products at our two local stores.
They simply don’t carry these little low-carb gems made by any brand. So, as I do, I decided to take the bull by the horns and make them for myself!
I make cauliflower pizza crust very often so I figured it really couldn’t be much more involved than all that to make some little bitty sandwich rounds. Luckily, it was an easy recipe to recreate.
How to make easy cauliflower sandwich thins
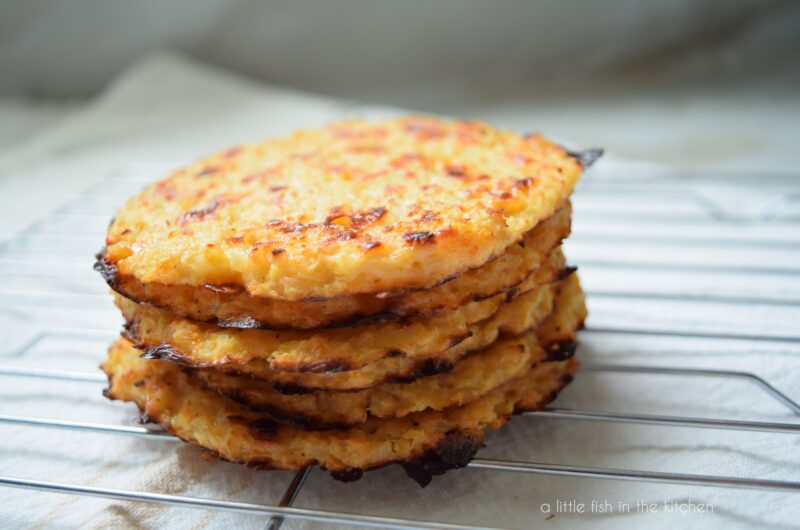
I keep this recipe simple by using one of the best convenience items created since sliced bread: a steamable bag of riced cauliflower! Once the bag of cauliflower rice is cooked, it must be cooled completely as it will be combined with beaten eggs, parmesan cheese, mozzarella cheese, salt, pepper and some flavorful smoked paprika to make the cauliflower thin base.
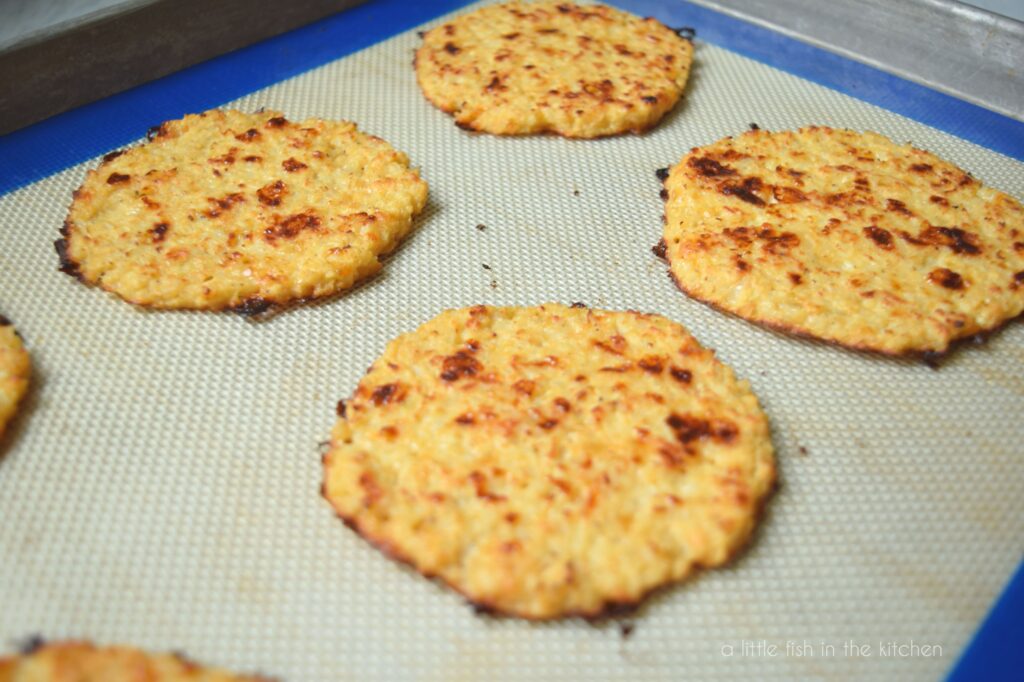
Next, just a little bit of good, old-fashioned elbow grease is needed to form this cauliflower mixture into four-inch patties. It’s best to portion the cauliflower mixture out onto the baking sheet and to shape the rounds with a handy dandy silicon spatula. I really don’t think using clean hands would be successful with this procedure as the mixture is very wet and sticky.
I love that this becomes a one-bowl, no-fuss recipe when it’s prepared this way. Making homemade cauliflower rice, cooking it, and then cleaning up after all that rigmarole would make this recipe for cauliflower thins so much more of a chore.
I’m all about work smarter, not harder most times, y’all!!
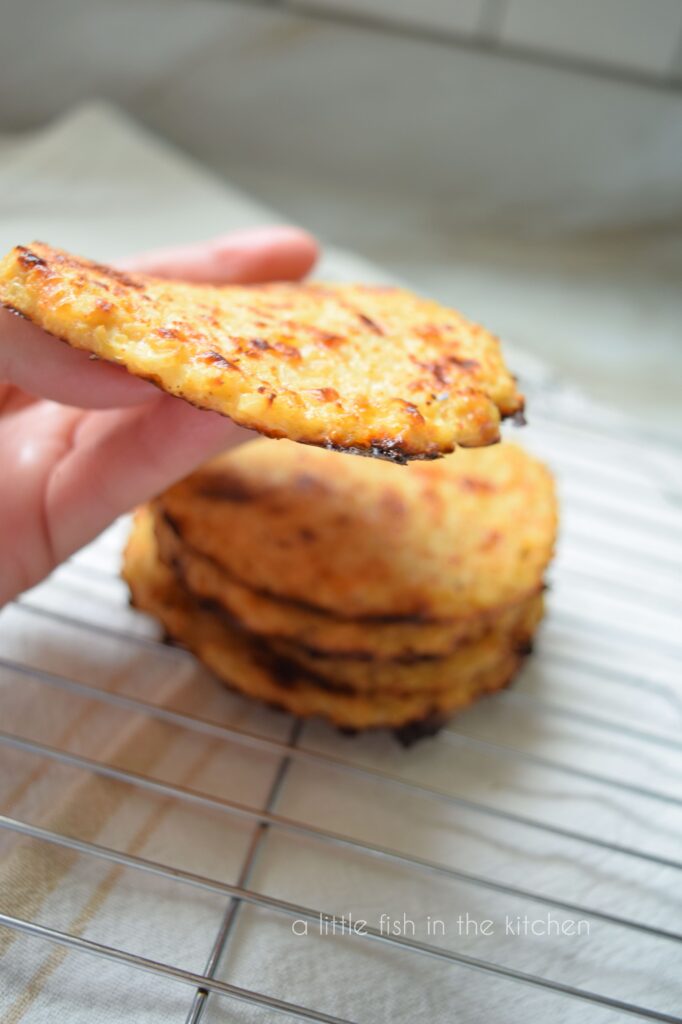
I love this recipe because it’s lived up to all the hype and I’ve enjoyed using these little sandwich thins in many ways. They truly are the perfect vehicle for a cheesy hamburger when a bread bun just isn’t the right choice. I also love to use them for open face sandwiches with my favorite creamy sandwich fillings like chicken salad, egg salad or tuna. These little rounds bake up hearty enough to hold up to those rich sandwich fillings.
I also enjoy using these cauliflower sandwich thins as substitutions for hashbrowns with an egg breakfast. One of my favorite morning treats consists of a sandwich thin topped with buttery scrambled eggs, cheese and sliced green onions!

Even if this may not be a recipe you will use for yourself, in this day and age it seems we all have a family member or friend who is following a low-carb, gluten-free or sugar-free nutrition plan. So, a recipe like this is a good one to have handy for those times when you might entertain those loved ones.
Especially if you live way out in the sticks like we do, and we just can’t swing by Trader Joes and pick some of these babies up!
I make a batch of these in my latest cooking video on YouTube, if you would like to see how I form them on the baking sheet. Otherwise, I try to be detailed about the method on the recipe card below.
Happy eating, y’all! xo – M
Be sure to share this recipe on Pinterest!
Please watch one my latest videos on YouTube and be sure to subscribe to my channel for more easy recipes and livestreams!
Enter your email address below to have all of my new posts sent directly to your inbox! Never miss a new recipe or an update, subscribe now!
Homemade Cauliflower Sandwich Thins
These Easy Cauliflower Sandwich Thins are a quick, easy and low carb replacement for bread if eating bread is isn’t the best choice. They also happen to be gluten-free and really delicious!
9
rounds20
minutes20
minutesKeep the screen of your device on
Ingredients
1 (12 oz) package steamable, frozen cauliflower rice
1/3 cup grated parmesan cheese (I used Kraft brand)
1/3 cup shredded mozzarella cheese
2 tablespoons coconut flour
1/4 teaspoon salt (to taste)
1/2 teaspoon ground black pepper
1/2 teaspoon smoked paprika
2 large eggs, beaten
Directions
- Line a baking sheet with a non-stick silicon mat or parchment paper and set it aside. Preheat oven to 400°. Next, cook the steamable cauliflower rice according to package directions. Transfer cooked cauliflower to a large mixing bowl and allow it to cool completely.
- After the cauliflower rice is completely cooled, add the remainder of the ingredients into the mixing bowl. Stir the mixture with a wooden spoon until it’s well-combined. Use a 1/4 cup measuring cup to portion out the cauliflower mixture onto the prepared baking sheet.
- Using the flat side of a small silicon spatula, press and shape the cauliflower mixture portions into 4 or 4.5 inch patties (each round should be about 1/3 inch in thickness). Take the time to smooth the edges as well as possible, no tears will make the cauliflower sandwich thins sturdier and easier to handle when piled with sandwich fillings. (**refer to recipe video below for a full tutorial on how to prepare this recipe**)
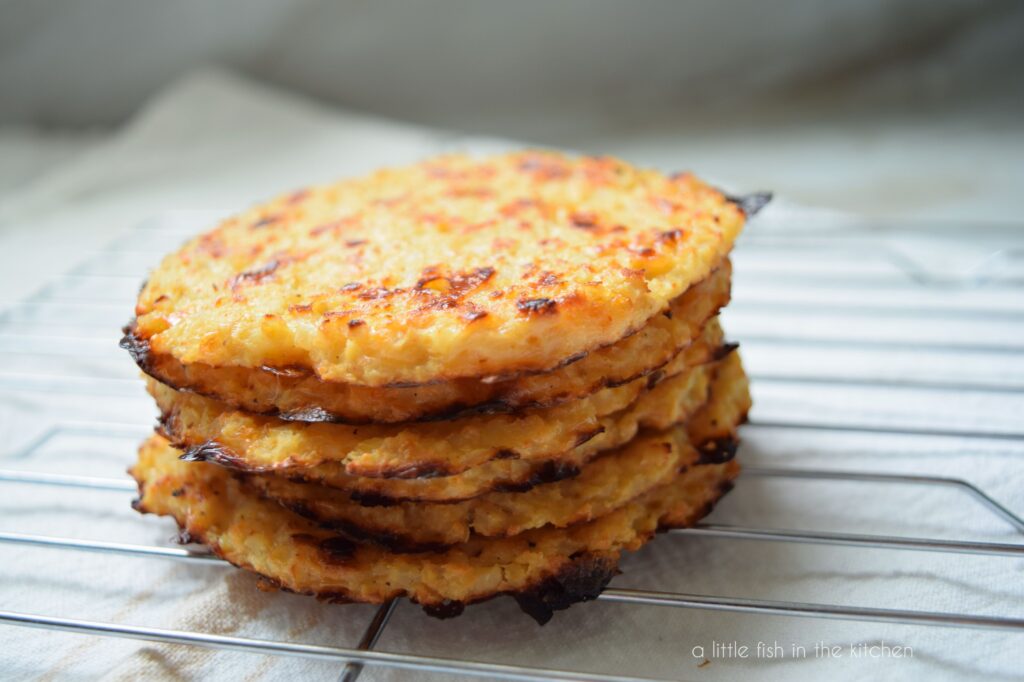
- Bake for 20 minutes or until the edges are golden brown and the cauliflower rounds appear done in the center. Transfer baking dish to a rack and allow them to cool completely.
- Serve room temperature as the substitute for hamburger buns or bread for any sandwich. Enjoy!
Recipe Video
Notes
- Recipe from A Little Fish in the Kitchen blog at www.alittlefishinthekitchen.com. All content is owned by Marcelle G. Bolton. Please contact the author for permission to republish.

Hi Marcelle!
I can’t wait to try your recipe this weekend!!!! I’m so excited! Can these be stored? If so, how do I store them and how long can I store them for?
Hi Travina, thank you so much for the comment and I truly hope you enjoy the recipe! I will be completely honest, I have never frozen these cauliflower thins. Between my husband and myself, they get eaten up within a couple of days, and I simply store them in an airtight container in the refrigerator during that time. However, if I was going to freeze them, I would store them in an airtight container, wrapped in freezer paper or parchment (helps prevent freezer burn), and separate them with small squares of parchment for easy separation. It would be a process much like how I store freezer waffles, you can check out that video here if you like, and I hope it helps. They will keep well in the fridge for about a week, and frozen properly I think about 1 to 2 months. Thank you again for giving my recipe a try! 💛
I made this today and substituted the cheese with habanero cheddar. I also substituted the coconut with almond flour. They turned out delicious and nice and spicy.
Hi Joanne, thanks so much for coming over and letting me know how the recipe worked for you! I’m so glad you enjoyed it! The spicy cheese sounds amazing, good call! I’ve got to try that for myself!! 🩷
what are the nutrient numbers? How many carbs per pattie?
Hello Susan, thank you for checking out my recipe! I don’t typically provide nutrition data on this blog, not for any recipe I share. Not all products/ingredients/brands I use are always available in every location where people follow my blog. Also, very often people don’t make the recipe exactly as I’ve written it and I can’t anticipate those random adaptations that occur. I don’t generalize the nutrition facts on this site for those reasons. I feel it’s the safest practice for people to do this for themselves for the most accurate results as that is very important information. Thanks again for the visit, I hope you enjoy the cauliflower thins! 🙂
I can’t have flour of any kind. Can I leave that out? Or sub with oats?
Hi Amy, I have never personally made these with oats, but I think it would be worth try. In fact, I have a post on the blog on how to make Homemade Oat Flour, which may work out better than whole oats. I hope it helps!! Thanks so much for reading my post 😊
I just made these and they were super easy and came out fantastic! Ty!!
Hi Laurie! Thank you so much for the comment and I’m so happy to hear you enjoyed the recipe!! We think it’s a keeper too 🙂 I hope you have a wonderful week! 🌻
Can these be frozen and then reheated in the toaster?
Hello Kristee! I have honestly never frozen these as between my husband and myself we eat them within a couple of days when I make them. I just store them in my refrigerator. However, I’m sure they will freeze just fine, and I recommend placing a piece of wax or parchment paper between them for easy release once they are frozen. 🙂 As for reheating them in a toaster once they are frozen, I can’t say for sure how that would work. I would be a bit concerned about water dripping into the appliance as a cauliflower round reheats from a frozen state. These rounds won’t have the absorbancy level of a regular toaster waffle, for example. At the moment, I prefer recommending for these to be reheated in a warm skillet, toaster oven or air fryer. I will try an experiment with freezing them and toasting them next time I make a batch and I’ll update my post with recommended preparation instructions once I do! Thank you very much for your comment. I appreciate you visiting my blog and I hope you enjoy the recipe!
I’m allergic to coconut can I use ap or chickpea flour?
Hello Agnes, all-purpose flour would definitely work in place of coconut flour. I have not ever used chickpea flour, but I don’t see why it wouldn’t work! Thank you very much for the comment and I hope you enjoy the recipe! 💛
I used almond flour and they came out perfect!
Just want to say we’ve just posted our last blog post. I’ve thoroughly enjoyed your blog, and I’ll still be visiting. But we’ve got a lot of activities lined up that will be occupying my time, so my visits will be much more sporadic in the future. Best wishes to you.
John, thank you for coming by!! I saw your FB post yesterday evening!! I wish you and the Mrs. the BEST in your upcoming adventures, but boy will I miss your blog! Thank you so much for the years of encouraging comments, I truly can’t tell you how much your support has meant to me. Safe travels, my friend and I look forward to hearing from you when you can!!💖
I haven’t heard of these! Guess I’m not trendy enough. 🙂 These look great — must try them. Thanks!
Thank you, John!
They sound and look delicious!
Thank you, Angie!
Heck, I would want to eat them as is! They sound wonderful!
Thank you, David!!